Water dripping through your ceiling is one of the most stressful moments a homeowner can face. What starts as a small damp patch can quickly spiral into rotted decking, collapsed insulation, and black mold — damage that becomes far more difficult to reverse the longer it goes unaddressed.
The longer you wait, the worse it gets. A single cracked shingle or failed flashing joint can allow gallons of water into your roof deck every time it rains, silently destroying your home from the top down.
This guide gives you everything you need to diagnose, repair, and weatherproof a leaking roof — whether you’re a seasoned DIYer or picking up a caulk gun for the first time. Follow these steps and protect your most valuable asset.
For a deeper dive into roof health and professional solutions, explore our Roofing Services and browse our Project Portfolio.
Before you can fix a leaking roof, you need to understand why roofs leak in the first place. Misdiagnosing the source is the single biggest mistake homeowners make spending time and money patching the wrong area.
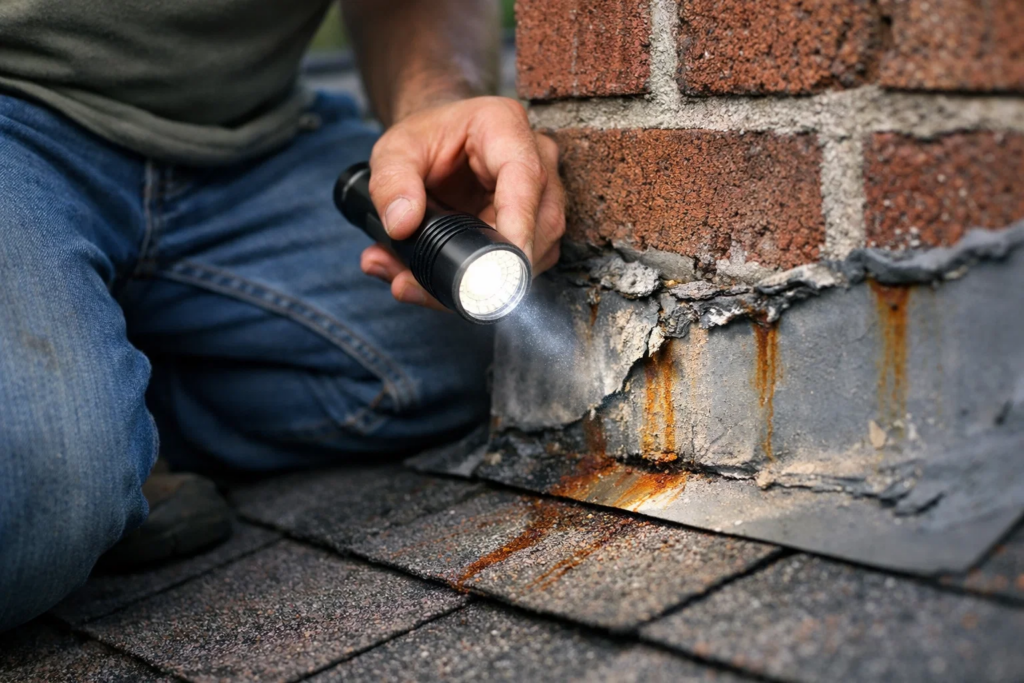
According to the National Roofing Contractors Association (NRCA), more than 70% of residential roof leaks originate from flashing failures, not shingle damage. Here are the most frequent culprits:
Key takeaway: Always trace the water to its actual entry point — which is rarely directly above where it drips inside.
Finding a roof leak requires methodical investigation, not guesswork. Water is deceptive — it can enter 6 to 10 feet uphill from where it appears on your ceiling.
Step 1: Inspect from the Attic First
Enter your attic with a flashlight during daylight or after rain. Look for:
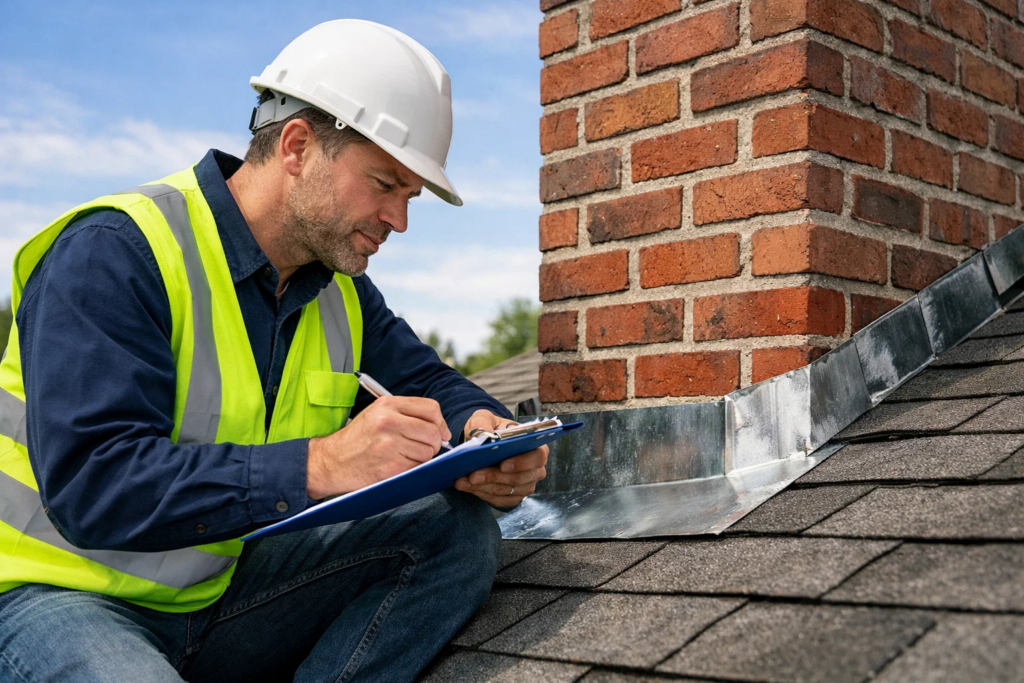
Step 2: Check the Roof Surface Systematically
Once safely on the roof (dry days only), work from the ridge downward. Inspect:
Step 3: Run a Hose Test
If the source remains unclear, have a helper inside while you run a garden hose over specific roof sections for 2–3 minutes each. Start low and work upward. This replicates rain and isolates the entry zone.
Pro Tip: Mark the suspect area with chalk before descending. Wet roofing materials look identical once dried.
Gathering the right materials before climbing on the roof saves time and reduces dangerous trips up and down ladders. Here is a complete checklist:
Tools
Materials

This is the core of your repair. Follow this sequence precisely for a watertight result.
Step 1: Prioritize Safety Never work on a wet, icy, or steeply pitched roof without a safety harness. Set your ladder on firm, level ground and use a standoff stabilizer. Inform someone of your work before ascending.
Step 2: Remove Damaged Shingles Slide a pry bar under the damaged shingle and lift gently to expose the nails. Remove all four nails and slide the shingle out. If surrounding shingles are brittle, warm them with a heat gun first to prevent cracking.
Step 3: Inspect and Repair the Roof Deck With the shingle removed, probe the exposed decking with a screwdriver. Soft or spongy wood indicates rot — these sections must be cut out and replaced with matching plywood before re-shingling.
Step 4: Install Ice-and-Water Shield (If Deck Was Exposed) For any area where decking was damaged or replaced, apply a self-adhesive waterproof membrane layer before the new shingle. This provides a critical secondary barrier.
Step 5: Slide In and Nail the New Shingle Align the replacement shingle with adjacent rows. Drive four roofing nails just above the adhesive strip (manufacturer’s nail line). Do not overdrive — nail heads should sit flush, not punching through.
Step 6: Seal All Nail Heads Apply a dab of roofing cement over each exposed nail head. Also apply a bead under the tab edges of the replaced shingle and the two adjacent shingles to reactivate their seal strips.
Step 7: Repair Flashing if Involved For flashing leaks, remove old caulk with a putty knife and brush. Apply a continuous bead of polyurethane roofing caulk along all flashing edges. For severely corroded flashing, cut and fit a new section of step flashing — do not attempt to patch-caulk heavily rusted metal.
Step 8: Seal Around Pipe Boots If the rubber collar around a vent pipe is cracked, slide the old boot off and replace it with a new matching size. Nail the base and apply roofing cement under the overlapping shingles around it.
Step 9: Test and Inspect Run your hose test again after completing all repairs. Re-enter the attic during or immediately after to confirm no new moisture entry.
Not every roof repair is a DIY job. Here is a direct comparison to help you decide:
| Factor | DIY Repair | Professional Roofer |
|---|---|---|
| Time | 2–6 hours | Same day |
| Skill Required | Moderate | Expert |
| Best For | 1–5 damaged shingles, minor flashing | Widespread damage, steep pitch, structural issues |
| Warranty | None | 1–10 year workmanship warranty |
| Safety Risk | Higher (DIY) | Lower (trained crew) |
| Tools Needed | Must own or rent | Included |
Choose DIY if: The damage is isolated to a small section, the roof pitch is walkable (under 6:12), and you are comfortable working at height.
Hire a professional if: The leak is widespread, decking is extensively rotted, the roof is steeply pitched, or your roof is still under a manufacturer’s warranty (DIY repairs can void coverage).
For help finding a vetted roofing professional, visit our Services page or Contact our team directly.
Even experienced DIYers make these errors. Avoid them to ensure your repair lasts.
1. Repairing Over Wet Decking Sealing shingles over damp wood traps moisture, accelerates rot, and guarantees the leak returns. Always allow full drying — 48 hours minimum after rain — before starting work.
2. Using the Wrong Caulk Standard silicone caulk does not bond well to asphalt, and it shrinks in cold temperatures. Always use a polyurethane-based roofing caulk or purpose-formulated roof cement.
3. Mismatching Shingle Age and Color Installing bright new shingles next to weathered 15-year-old ones does not just look bad — the old shingles may be near end-of-life, meaning another leak is imminent nearby. Evaluate whether a full section replacement is more cost-effective.
4. Nailing Through Flashing Driving nails through flashing (rather than under it) creates new penetration points. Flashing should be integrated into the shingle layer, not surface-nailed.
5. Ignoring the Attic After Repair A completed exterior repair does not automatically fix damaged insulation or framing below. Always return to the attic to remove wet insulation, treat any visible mold, and confirm the repair sealed completely.
6. Working in Unsafe Conditions More than 100,000 Americans are injured annually in ladder-related accidents. Never work on a roof in rain, high wind, or temperatures below freezing.
Repair is reactive. Prevention is where the real savings live.
See how we’ve handled complex roof repairs firsthand on our Our Work page, or get in touch for a professional assessment.
Start in the attic with a flashlight during or after rain. Look for water stains, mold, or damp insulation on rafters. On the roof, inspect all flashing junctions, pipe boots, and shingle edges. If the source isn’t visible, run a garden hose over specific zones while a helper watches from inside.
Yes, for minor damage like a few cracked or missing shingles or failed caulking around flashing. However, extensive deck rot, steep pitch, or a roof under warranty should always be handled by a licensed roofing contractor.
Use a polyurethane-based roofing caulk or asphalt roofing cement for most repairs. Silicone caulk is not recommended for roofing applications as it does not bond properly to asphalt or granule surfaces and can shrink in cold weather.
A properly executed shingle replacement or flashing re-seal typically lasts 5–15 years, depending on materials and weather exposure. Repairs made with the correct materials on a dry deck will outlast surface-only patch jobs by years.
Leaks that only appear in heavy rain typically indicate a flashing gap or a slow-draining area where water pools under shingles before finding a penetration point. High-volume water overloads a partially blocked pathway that light rain cannot reach.
If your roof is under 15 years old and damage is isolated to one section, repair is almost always the right call. If the roof is 20+ years old, damage is widespread, or you’ve had multiple recurring leaks, a full replacement is worth evaluating with a licensed contractor.
Apply a roofing tarp over the affected area, weighted or secured with nails along the ridge. Roofing tape or self-adhesive flashing tape can provide a temporary interior patch on exposed decking. These are emergency measures only — permanent repair must follow as soon as conditions allow.
A leaking roof is never just a roofing problem — it is a threat to your home’s structure, air quality, and your family’s comfort. The good news: when caught early, most roof leaks are entirely fixable with the right materials, a methodical approach, and proper safety precautions.
Key takeaways from this guide:
Your roof is your home’s first line of defense. Give it the attention it deserves — and if the damage goes beyond a few shingles, don’t hesitate to call a licensed roofing professional before a manageable repair becomes a full replacement.
DIY repairs work for minor damage — but some leaks run deeper than they appear. If you’re unsure about the source, dealing with recurring leaks, or simply want a professional eye on your roof before the next rainstorm, Royal Roofs is here to help.
Our experienced roofing team handles everything from minor patch repairs to full roof inspections — done right the first time.